

Earlier in 2019 I spent the day running drop in headshot sessions with the dance and drama students at our local college. They were all just about to take the next step in their careers, and start auditioning for places at university and performing arts schools, and needed headshots ready for each application. As they were in the middle of their exam performance rehearsals I had 15 minute sessions with each student throughout the day; I had to be quick and thorough which is actually really difficult to do…
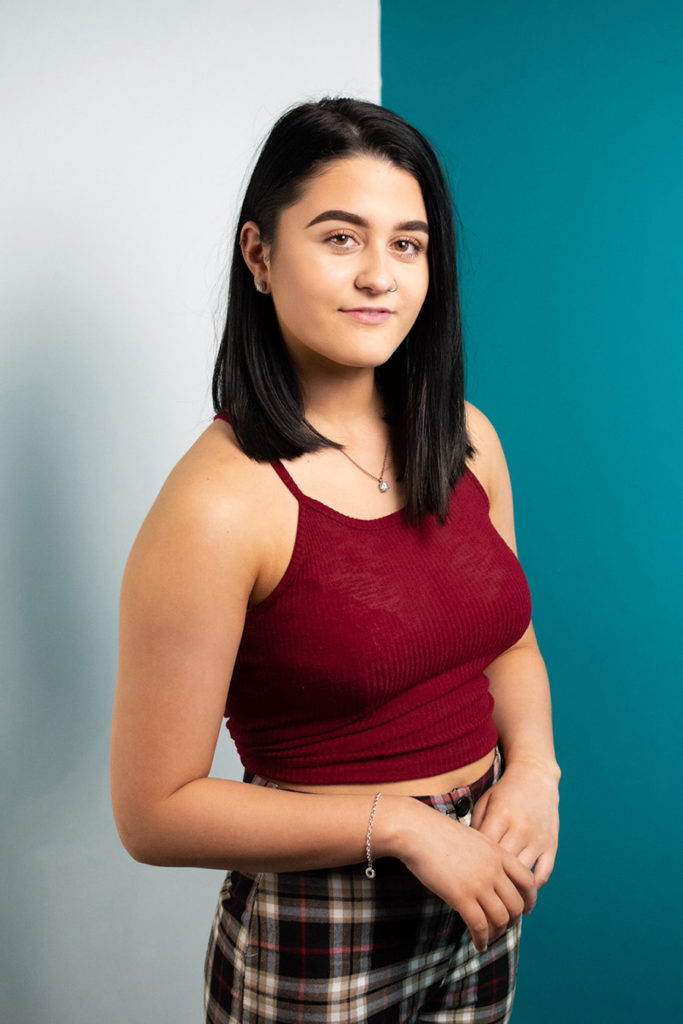
For this post, I thought I’d share one of my favourite images from the session and go through how I created it. This is Claudia, and she was one of my last headshots of the day.
The Set
I was set up in a small classroom that, luckily for me, had these incredible turquoise walls, and I couldn’t not use them. I had 3 backgrounds ready for each student; flat white, flat turquoise, and a corner of the room where the wall was half and half. The half and half background is my favourite! The colour mix worked well for pretty much everyone, and the palette in Claudia’s portrait is full of deep, exciting colours. Because I was in quite a small space, I was easily able to manoeuvre my lights around to each coloured section and take several portraits in each time slot.
The Lighting
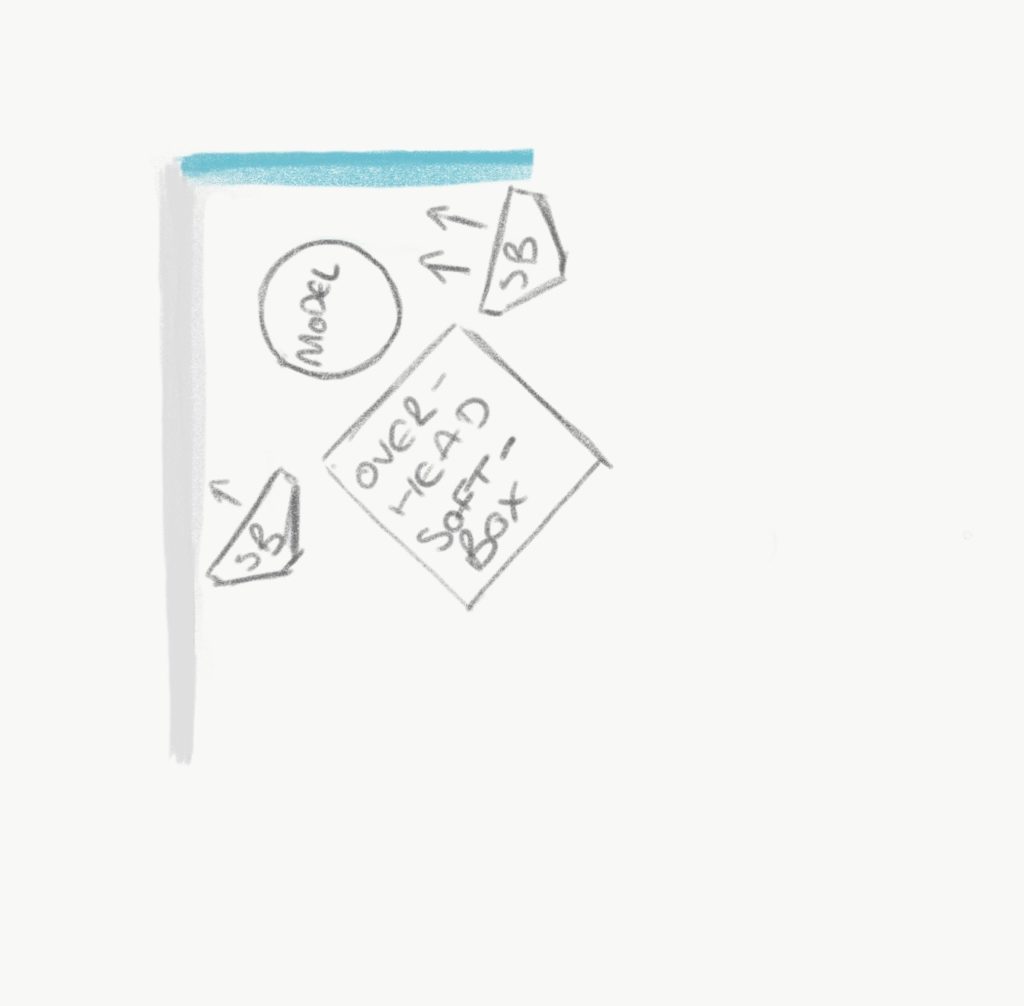
I used a really simple 3 soft box setup to make sure that each of my subjects were evenly lit, and didn’t have any weird shadows. I’ve drawn a very technical diagram below, but essentially I had a soft box on either side of Claudia as fill lights, and a soft box positioned infant and overhead as a keylight. I tried to keep the set up as simple as possible as I needed to tweak each box’s position quickly, and move them about the room for each session.
You can do as many sessions as you like, but it’s an unwritten rule of the universe that no two consecutive models will ever be the same height.
The Camera Settings
I like to chat with the people I’m working with; you get much better portraits that way. I’m not claiming that’s totally correct, but it works for me, so I generally tend to stick with it and change my camera settings to accommodate. Being in a studio setting makes life a little easier because you don’t need to change much between sessions, however it is worth double checking your settings for each subject in case you need to compensate for different skin tones.
I kept my shutter speed at 1/250, with my aperture between f/3.2 and f/1.8, and ISO at 2000 for the majority of my sessions. This worked really well with the static lights, and helped freeze Claudia in between our conversations.
The Composition
The point of headshots is to honestly show casting teams what you look like; there’s no getting away from the fact that you have set poses you need to have covered. It’s a functional portrait session and not, unfortunately, a chance to exercise your creativity. I stuck to a few specific portrait types; close up of the face, head and shoulders, and mid-thigh up. To make sure the images were flattering, I asked each student to stand on a slight angle, and this is what you can see in the image of Claudia above.
The Edit
As with the composition, I kept the edit as natural and minimal as possible. in all honesty, all of the kids I met were super photogenic so they didn’t really need much work anyway. I re-cropped and straightened each image before evening out colours, and cleaning up the background – the downside of being in a classroom environment is that there are Blu-Tac marks everywhere.
When I first started planning for this session I hoped that the basic set up I had would be enough. It turns out that there really is no great secret to portraiture (sorry Photography gatekeepers!). I mentioned in a previous post that you’d be surprised at what you could do with a few soft boxes, and I hope that I’ve been able to reinforce that take in this post. If you have found this useful, and have used some of my tips in your own work I’d love to see it!
Leave a reply